In this guide, PCM.daily will show you how to make and add mini shirts to your game - and don't worry, it's not difficult at all. No graphic skills are needed.
This guide is based on PCMScandinavia's mini shirt guide.
Tip: The three explanatory screenshots can be clicked - this will enlarge them.
What's a mini shirt?
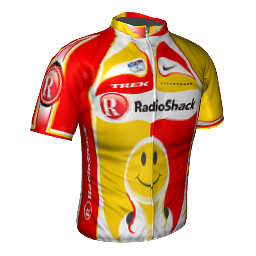
A mini shirt is the the piece of graphic which is displayed when you select a team, pre-races, etc. More often than not, these are not included with the 'actual' shirts, and therefore, it's quite handy to be able to make them yourself, especially if you like using the "Custom Team" feature.
Here's an example of a mini shirt (you can find the ones included with your game installation in Program Files/Cyanide/PCM/Gui/team_shirt):

Files that you need
- The free 3D Program Blender. You can get the latest version here.
- The base mini shirt file (for Blender). Get it here.
- ... and the shirt that you want to convert to a mini shirt, either in jpg, png or tga
How to make the mini shirt
First of all, you do of course need to install Blender. When that's done, you can open the program by double clicking the base mini shirt file (the 2nd file I asked you to download). If Windows doesn't know which program to use, right click the file and select "Open with" and find Blender.
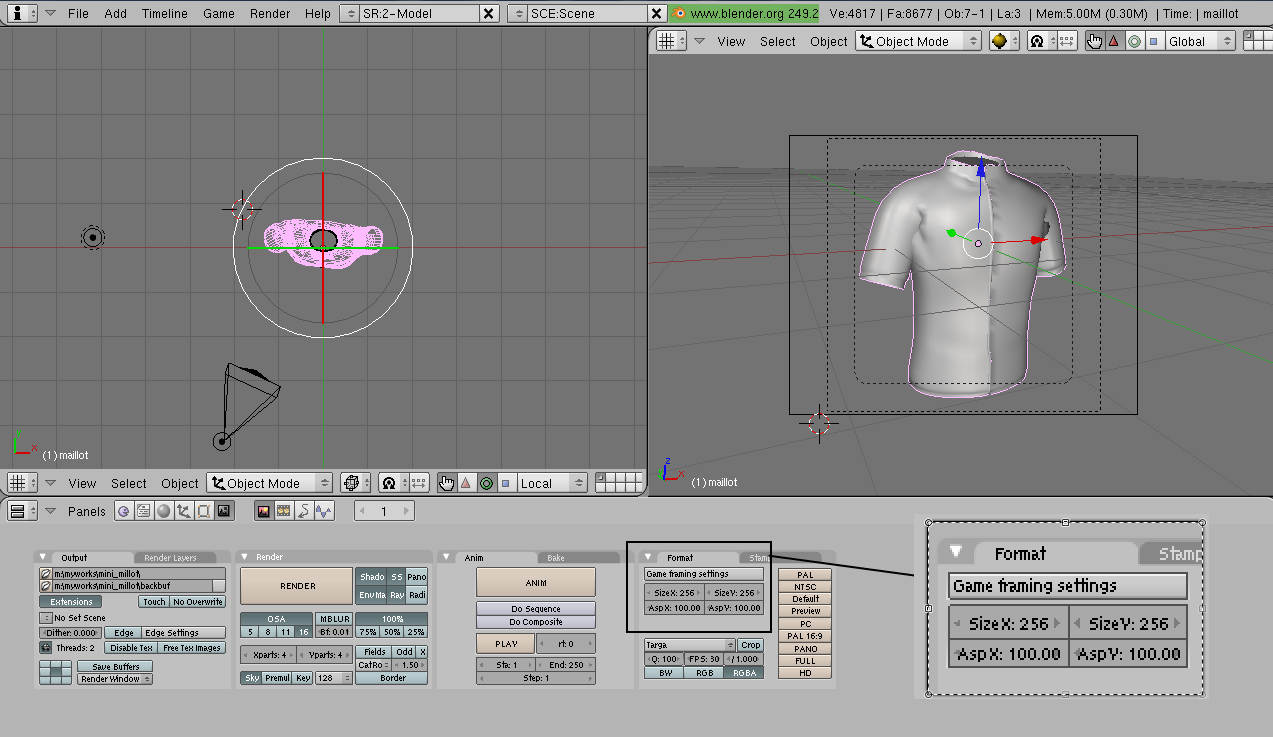
When the program has opened, it looks a bit complicated - don't worry, it's not. Start by clicking F10 on your keyboard. This will change the lower-bar menu. In the right menu - the one where it says "Format" - change SizeX and SizeY to 256.

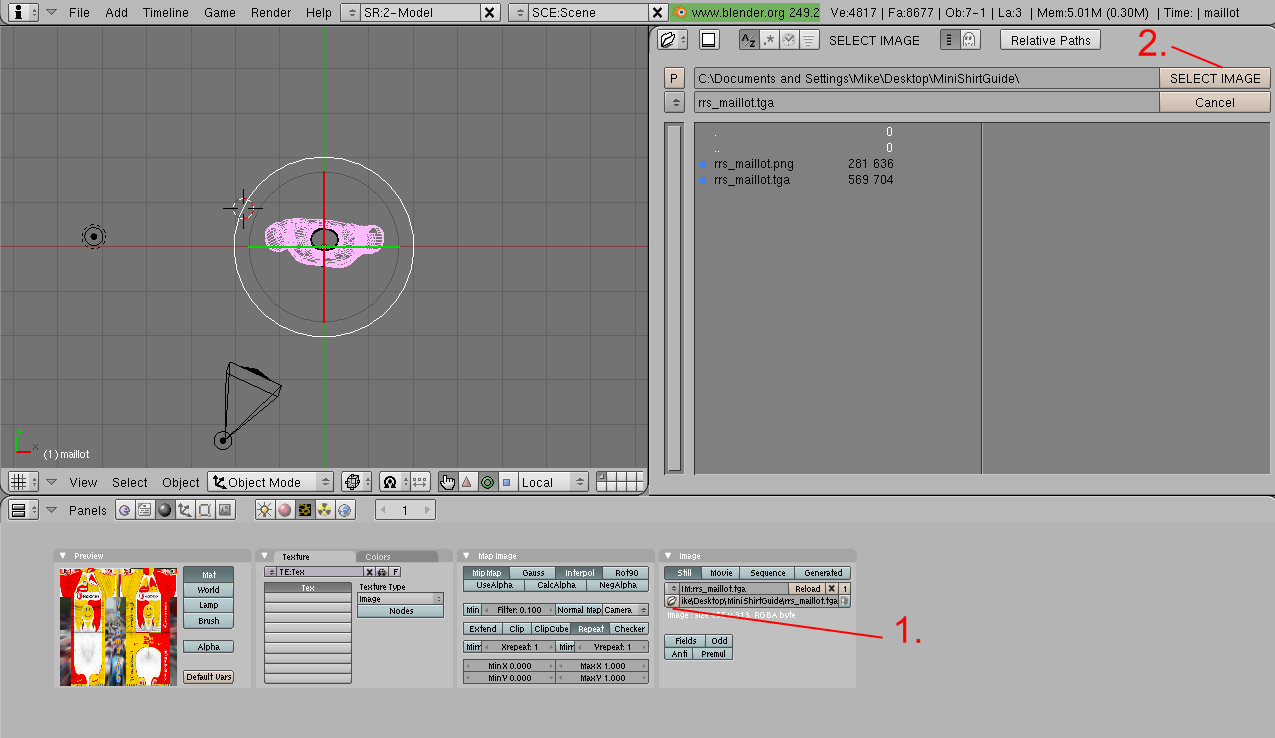
When that's done, click F6. Again, you need to use the right menu, the one called "Image". Click the folder icon. In the menu that appears, you need to find the shirt that you want to convert. It's recommended to use 32 bit TGA files, but it's also possible to convert directly from .png or .jpg. There are some side effects of using the latter two, but I'll explain that later. Anyway - when you've found the shirt, click "SELECT IMAGE".
Tip: If your shirt is located on your desktop or somewhere else in your Documents folder, you may have to enter your username manually into the address bar.

How to save the mini shirt
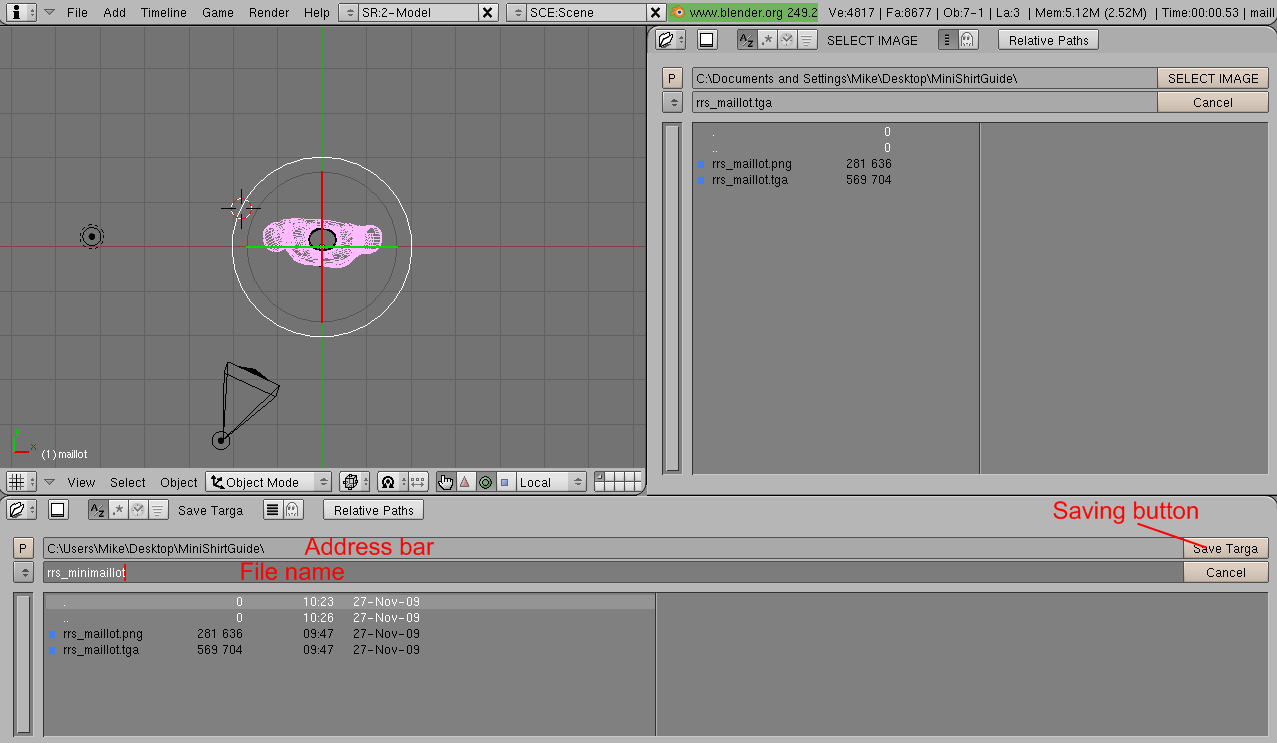
Almost done. Click F12 - a window will pop up with an example of your mini shirt. In many cases, it will have a weird background colour, but don't worry about that. It can't be seen in-game. Return to the main window and click F3. This will open the saving menu. Choose where to save in the 1st bar and select a file name in the 2nd bar. When done, click "Save Targa".
Find your mini shirt and check that your mini shirt file has a size of 256 KB. If your mini shirt is based on a tga file, it will probably have the right size. If it's based on png or jpg, it's likely to be too small. In that case, open it with Paint.NET, hold down CTRL + S and click OK.
If you're using a custom team and using the c01 folder, you have to name the file c01_minimaillot and place it in Program Files/Cyanide/PCM/Gui/team_shirt. You may have to delete the original c01_minimaillot file before yours will be used. Likewise, if you want to replace Saxo Bank's mini shirt, the correct file name would be sax_minimaillot.

|


